As consumers, we are spoilt for the variety of good broadband pricing plans in Singapore. But one key difference from a Business Plan is the latter can offer static IP. What does it mean for us? For a regular plan with dynamic IP, our router is exposed to the public network with changing IP address i.e. there is not fix IP which we can access your home network.
Good news is that there is a workaround – secure a domain/hostname and let your router or NAS update it regularly of public IP via Dynamic DNS (DDNS) function. And best of all, this method is totally FREE!
Here is how you can do so:
[PUBLIC INTERNET] > [HOME ROUTER] > [SYNOLOGY NAS]1) Setup a free host service from DynDNS.org. If you have your own domain, you can manage your domain under Zone Services.
– ABC.dyndns.org
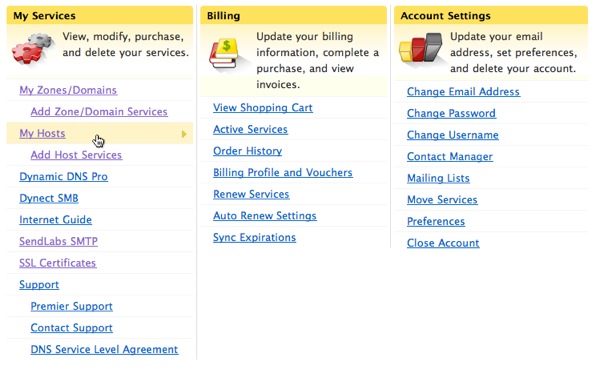
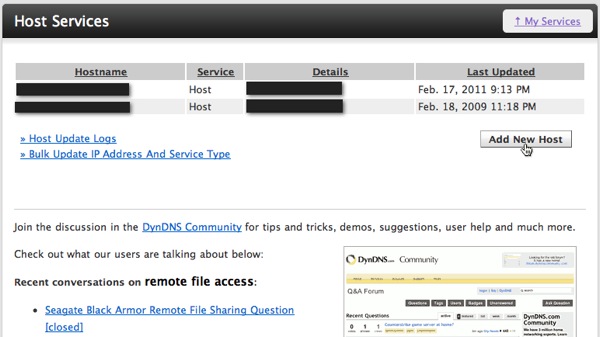
2) Once your new hostname is established, you will be able to see it under Host Services management console. When your network public IP is successfully updated against your designated Hostname, you will also see the IP refreshed under ‘Details’.
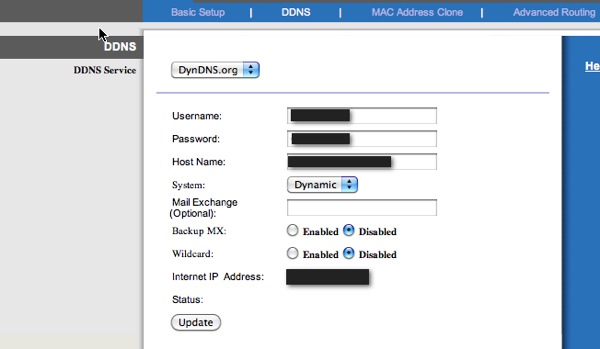
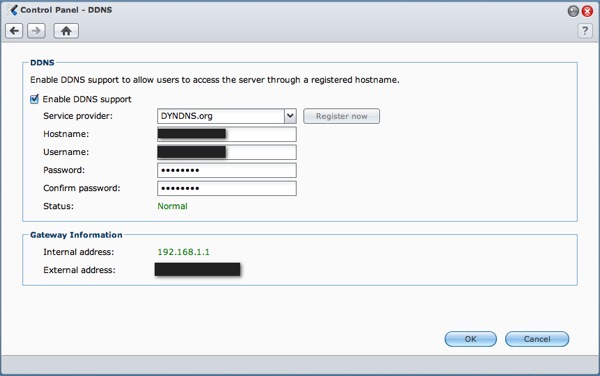
3) You can set up the DDNS update at supported router (e.g. Linksys/CISCO) or supported Network Access Storage (NAS). But do not activate both at the same time.
Typical Linksys/CISCO router:
Typical Synology NAS:
4) Now you should be able to access your home router gateway using the newly created DynDNS hostname i.e. ABC.dyndns.org will resolve to your home public IP.
5) To ensure the services packets are transmitted to the correct devices within your home internal network, you need to setup port forwarding at your router gateway
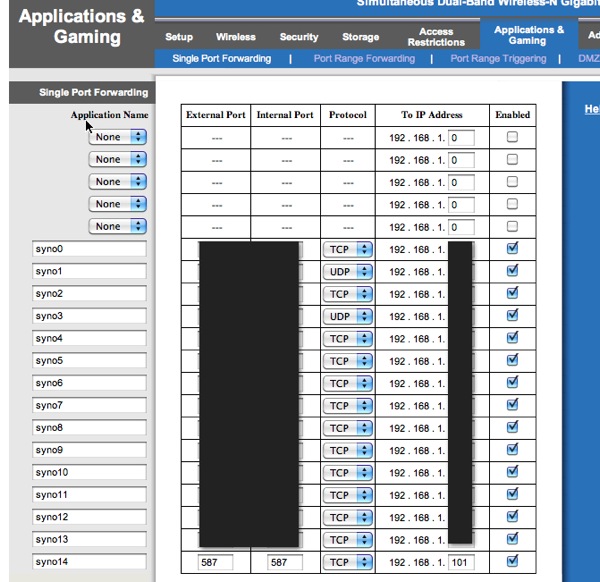
E.g.
If your Synology NAS internal IP is 192.168.1.200 and you are running BitTorrent on port 6000, you need to add a port forwarding entry:
From Port | To Port | Protocol | To IP Address
6000 6000 TCP 192.168.1.200
If likewise, you need to access FTP on your NAS:
From Port | To Port | Protocol | To IP Address
21 21 TCP 192.168.1.200
That’s it, real simple to access your home devices even when you are on the move or out of home!
Other Related Posts:
%RELATEDPOSTS%
Follow us on:
Share this article on:

